Posts

TM Viper TQS on my pit

Image
  I do not want to choose between my new TM Viper TQS and Warthog. So, both on then? So, I put some quick release handles to fix them on the 1010 rails (with some 1/4" thick aluminum plates I have hanging around in the garage as adapters). Now, all 3 controllers are screwed down with quick release handles... So, if I am going to fly F18, then , just unscrew the 3x quick release handles on the TQS, slide it back, then do the same thing for the Warthog throttle. I think I am going to reconfigure my setup for AH64. Originally, I have a TM Boeing throttle quadrant for power but use the warthog throttle for rotor pitch control. I am thinking about reconfiguring it so now Warthog throttle will be the power lever, and TQS will be the rotor pitch control. I don't fly AH64 that much... I am mainly an YF16 and P51 guy since I was in elementary school. Oh, BTW, there is the African Mahogany keyboard tray with Tung Oil finish. Now it doesn't look so out of place like the temporary one...

To the PIT! To the PIT! Add more "stuff" to the PIT.

Image
 Added the followings: Two front posts. A sliding keyboard tray. The original idea was to add the two front posts, and then hang two horizontal bars between the two posts. The top bar was intended to hang TM Boeing Yoke, or a driving wheel. The lower bar was intended for hanging a sliding keyboard tray, preferably slightly above the lap, and moveable so to facilitate ingress and egress. Basically, create a "gate" to hang stuff. Eventually the build progressed to erect the two posts... Hmmm... very sturdy. They alone would stand fast and steady, the horizontal bars are not structurally required. So, on the left post, I hung a small arm tray... for a keypad (for FPS), and the lower post hung a longer arm for keyboard. This almost reached the ideal lap position... On the right post, currently I hang a small arm tray, intended for a mouse pad. Then, instead of constructing the horizontal bars, I decided to hang the sliding keyboard tray under the hefty table. This is a sliding ke...

A Pit Finally?

Image
Had quite some family events... a bit of health issue... so I haven't worked on my hobby for awhile. Anyway, over the labor day weekend, I started a new build... as usual, always WIP. This is just stage 1, to get it functional. There will be improvements down the road, depending on the experience using it. I built this mainly because of my health problem causing my calve to hurt when sitting on an office chair reaching out for the rudder pedals. That posture is just no good for me. So, I build this thing such that I can sit low down at the pedal level, just like in a jet fighter. Basically, it's built around a sliding racing chair bought from Amazon. It's a chair made by Ikon. So, no center mount stick! The base is made with 80/20's 15 series aluminum extrusion. The panel rails are built with 10 series extrusion. Other than the corner brackets and standard 10/20-series nuts, the rest of the brackets are made on my CNC mill. A drill press would do, but I have the CNC mil...

Price Comparison Between Shapeways and DIY

Image
The screenshots speak for themselves.

Design One Thing Test Many Times

Image
Many prints, prototypes, corrections... 

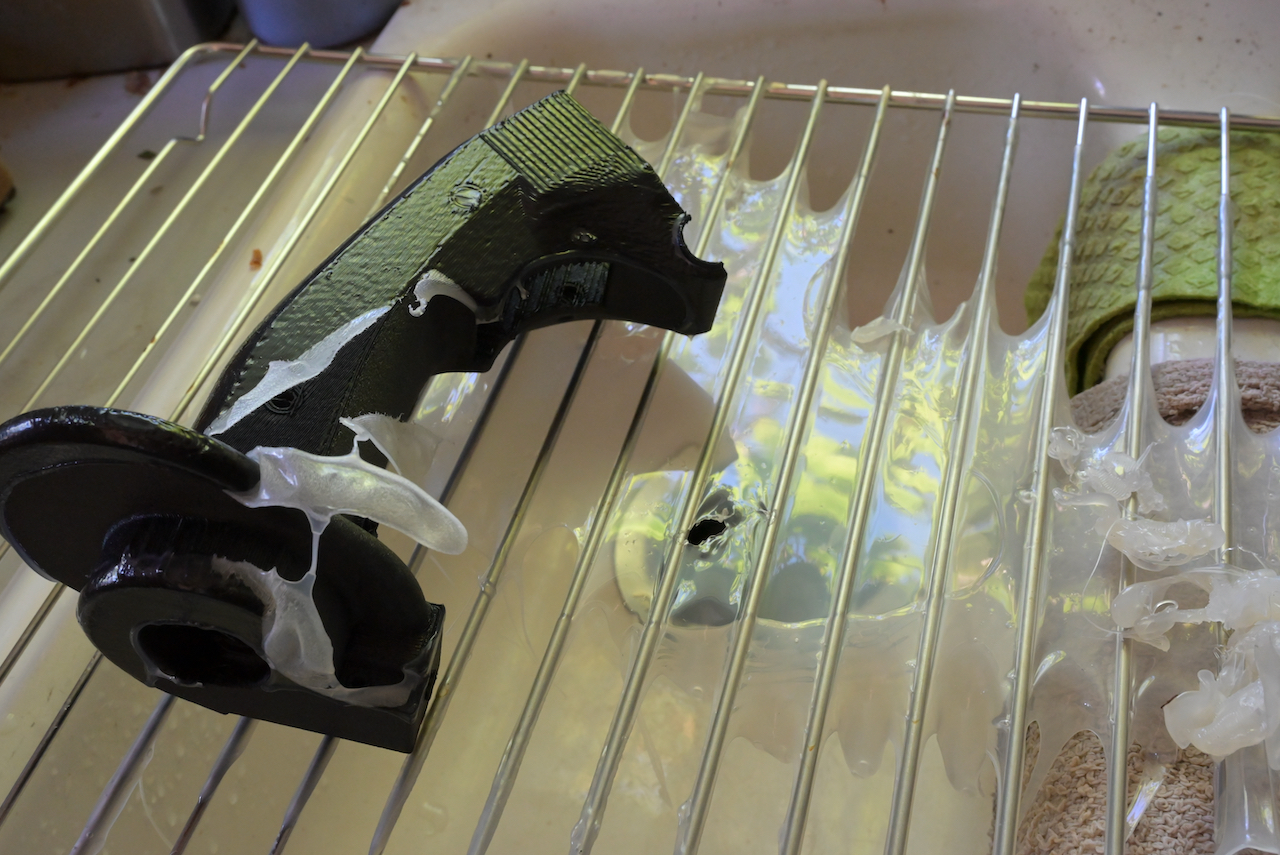
Kids, don't do LDPE!

Image
Friends don't let friends do LDPE! Your wife is going to be pissed off at you for doing it. Good news... LDPE is not compatible with Nylon... so it doesn't bond with Nylon. But the bad news is that it slumps too much and pretty much disintegrated, making using the bag in the Anova Precision Oven completely moot. Now my oven smells plastic. It started slumping at about 8 hrs, just like in the previous test. So, I guess in the glass state, LDPE has very low viscosity... so it looked like it melted, but it's not... it just "slumped." It's like glass... technically glass is not exactly a solid, it's an amorphous solid... it flows. The LDPE bag in glass transition state is like that too, just much less viscous. But because it does not bond with Nylon, it's very easy to peel off. When it cools, it's very easy to get off stainless steel too. So, cleaning up the mess isn't too much of a trouble.... it's the lingering plastic smell that is gonna pis...

Sous Vide Test on Nylon12+CF Controller Success!

Image
Sous Vide test on the F16-like Controller printed in Nylon12+CF (PA12 with Carbon Fiber) is a success! It passed the fit tests with other parts that are not annealed. Note that this test is not to test the strength of the annealed part! I currently do not have equipments to conduct such tests. I will take the words of literature for it. The purpose of this test is to test the viability of using an Anova Precision Oven in Sous Vide mode for annealing a Nylon12 artifact, holding it at 100˚C for 12 hours, without ruining my oven, nor the artifact. And whether that process would distort the parts, or any other problems. Indeed, I found a problem. You can find in the picture below that there are some "shining" surfac patches. These are where the plastic bag touched the artifact. The temperature is not high enough to melt the bag, evidently because when I took out the bag, it was still "dry" looking, and kind of brittle, where it did not touch the artifact. My guess is th...